Step 3: Installing ADT
ADT stands for "Android Development Tools". It is the plug-in designed to make Eclipse the most powerful Android App development environment. By Installing ADT, Eclipse is enabled and empowered to develop Android app of any sort.To get more details , read : http://developer.android.com/sdk/installing/installing-adt.html
Ok, I m going to do it now...
I start Eclipse, and go to help>install new software
Then , I get a dialog like below, I click add button.
In add repository dialog that appears , I add following.
Then press "OK".
you will get 2 "Available Software"s. Developer tools are the one I need for the moment. NDK as I know stands for "Native Development Kit" which allow developers to include C++ code in to Android program code which I don't need (may be fore ever :) )
When I press next , the wizard shows the list of tools that will be downloaded.Press next,
Then accept the agreement and click finish.
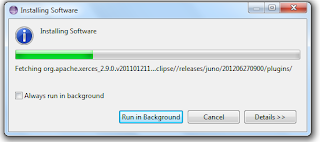
ADT started downloading..I think things going ok.
Once ADT download is over, Eclipse is enabled for Android devolopment and it immidiately ask for Android SDK. See below.
What is Android SDK by the way? I will write in next post.


No comments:
Post a Comment